The Four Victim Positions Every Lifeguard Should Know
You’ve made the grab. You’ve cleared the break. You’ve pulled the victim onto the sand.
The adrenaline might be pumping, but the real clinical work has just begun. Many lifeguards treat the sand as a "safe zone" where the rescue is over, but in reality, the post-extraction phase is where you manage the patient’s long-term outcomes. Whether you are dealing with a near-drowning, a medical event, or a trauma, your ability to position the patient correctly is one of the most effective, non-invasive medical interventions you have.
If you aren't already using these four positions as your standard, start incorporating them into your dry-land drills today.
1. The Recovery Position
(The Airway Guardian)
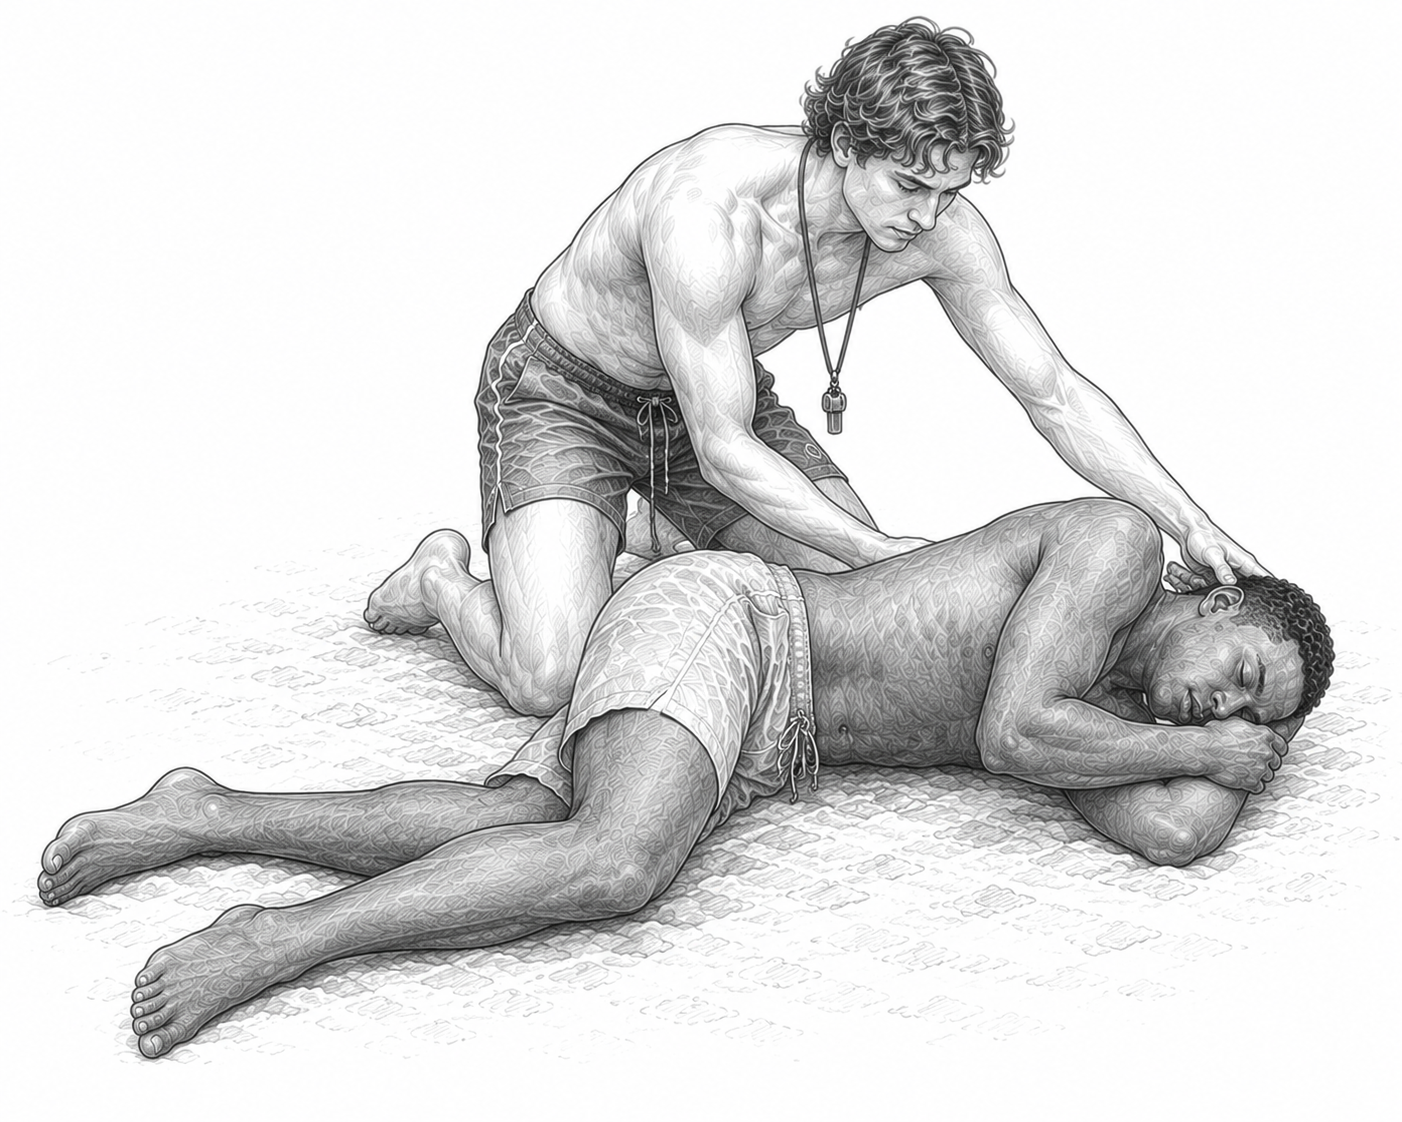
If you have an unconscious, breathing victim, the recovery position is non-negotiable.
Why: It is designed to keep the airway open and prevent aspiration. In a near-drowning scenario, the victim’s stomach is often full of seawater. If they vomit while lying flat on their back, they will likely inhale that fluid, leading to secondary drowning or chemical pneumonia.
The Technique: Roll the patient onto their side, tilt the head back slightly to keep the airway clear, and tuck the top hand under the chin.
AOR-Tip: If you have even a slight suspicion of a spinal injury, you must perform a log-roll with a partner to ensure the head, neck, and torso remain perfectly aligned during the turn.
2. The Semi-Fowler’s / 30-Degree Position
(The Respiratory Assist)
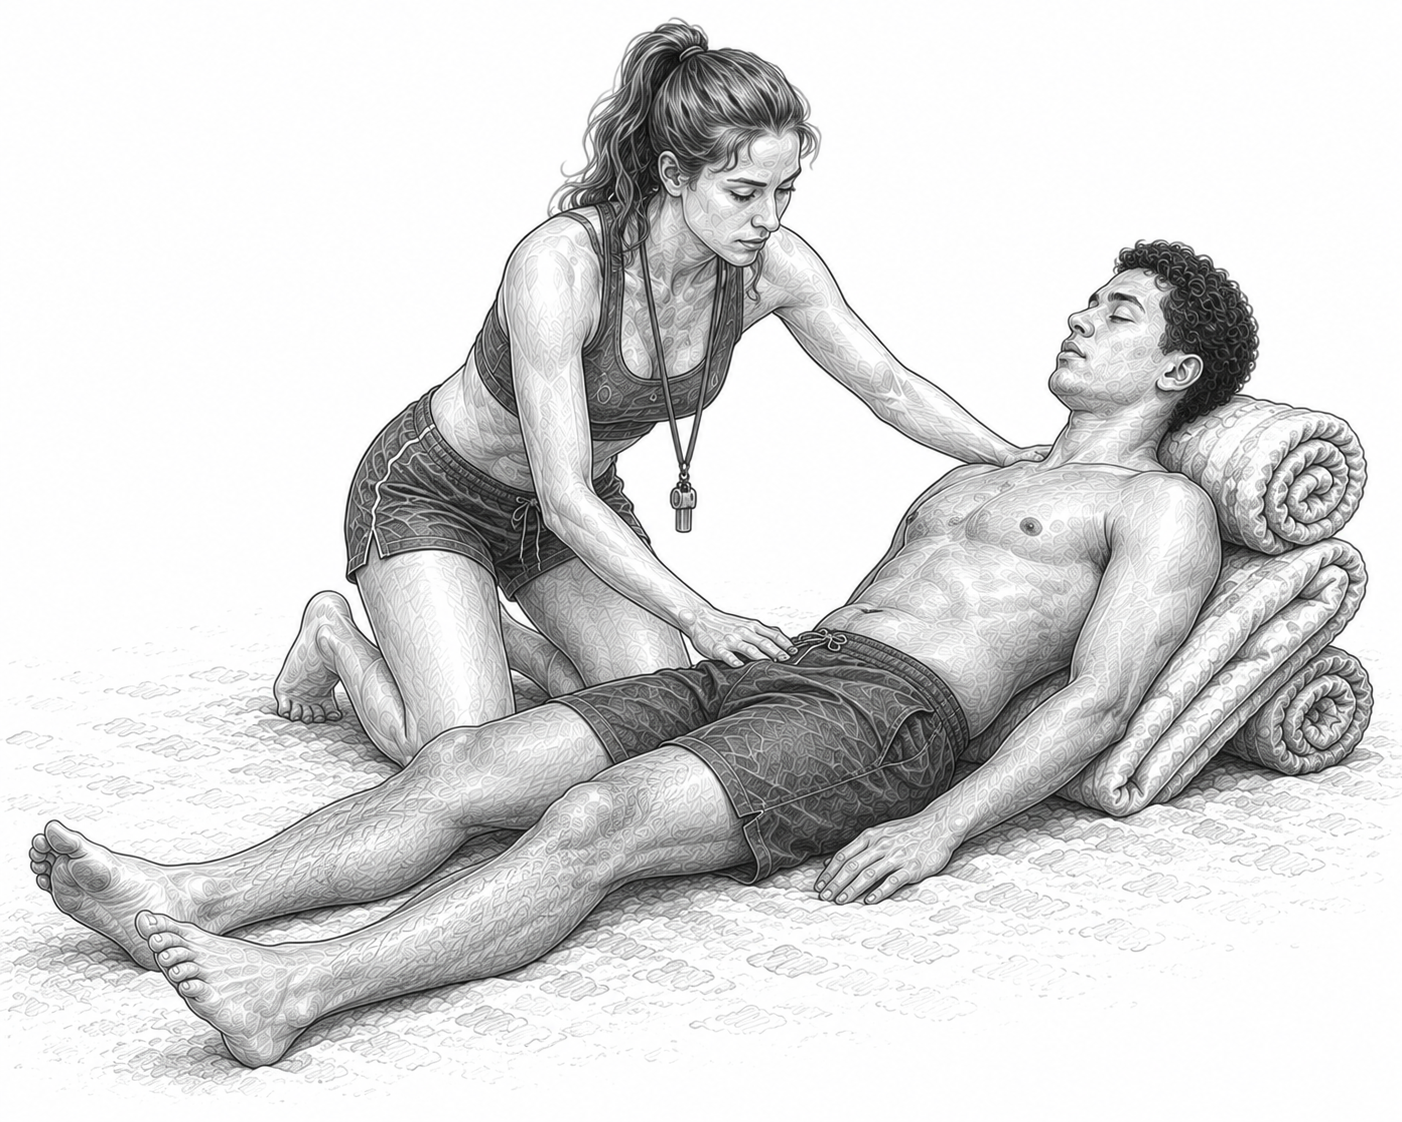
When a victim is conscious but struggling to breathe—perhaps due to water inhalation, a potential stroke, or heart-related distress—lying them flat can actually make their job harder.
Why: Elevating the head and torso to a 30-degree angle reduces venous return to the heart, which can help ease pulmonary congestion and make it physically easier for the diaphragm to descend. It is the go-to position for maximizing oxygenation.
The Technique: If you are on the sand, use a sand-wedge, a folded towel, or even a rescue tube / torp to prop their upper body up. Keep the knees slightly bent if possible to further relieve abdominal tension.
3. The Supine "High-Performance" Position
(The Cardiac Standard)
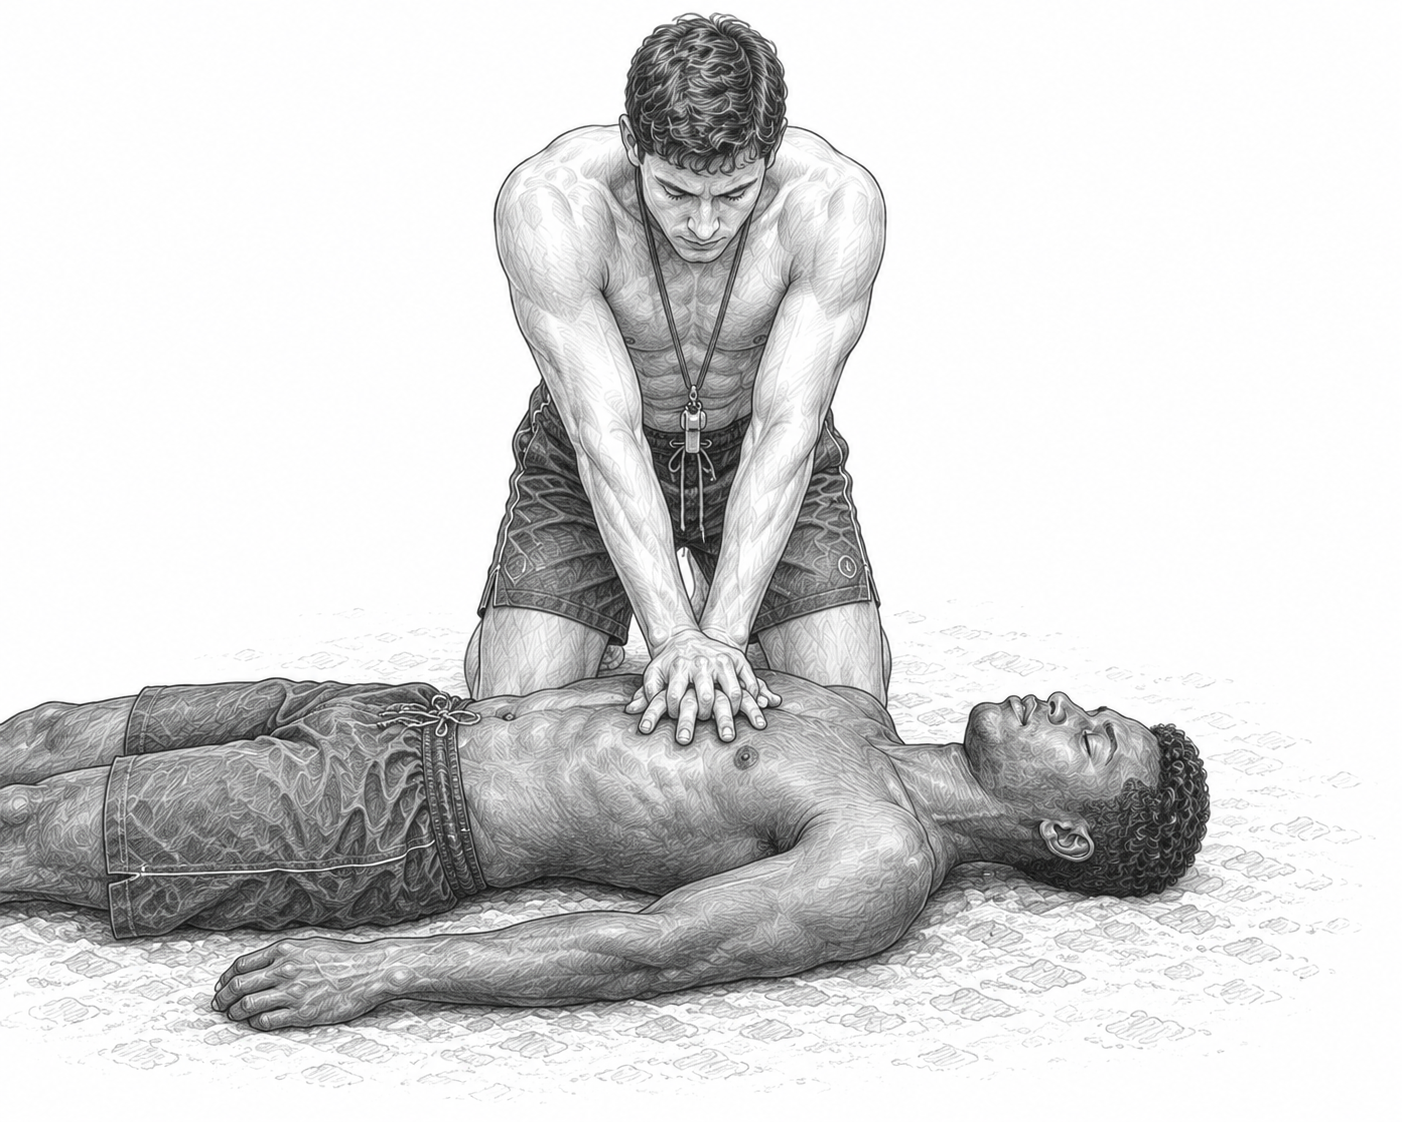
We all know that CPR must be performed on a hard surface. But not all beaches are firm enough to provide support.
Why: If you perform CPR on soft sand that is “too soft,” your compressions are essentially hitting a mattress. The sand absorbs the energy of your push, meaning the victim’s heart isn't getting the perfusion it needs.
The Technique: You need a rigid surface immediately. Use your rescue board as a backboard. Of course, a spine board is even better. Slide it under the patient during your initial assessment. This ensures that every ounce of energy you put into your chest compressions is transferred directly to the victim’s sternum.
4. The Neutral/Supine Spinal Position
(The Immobilization Anchor)
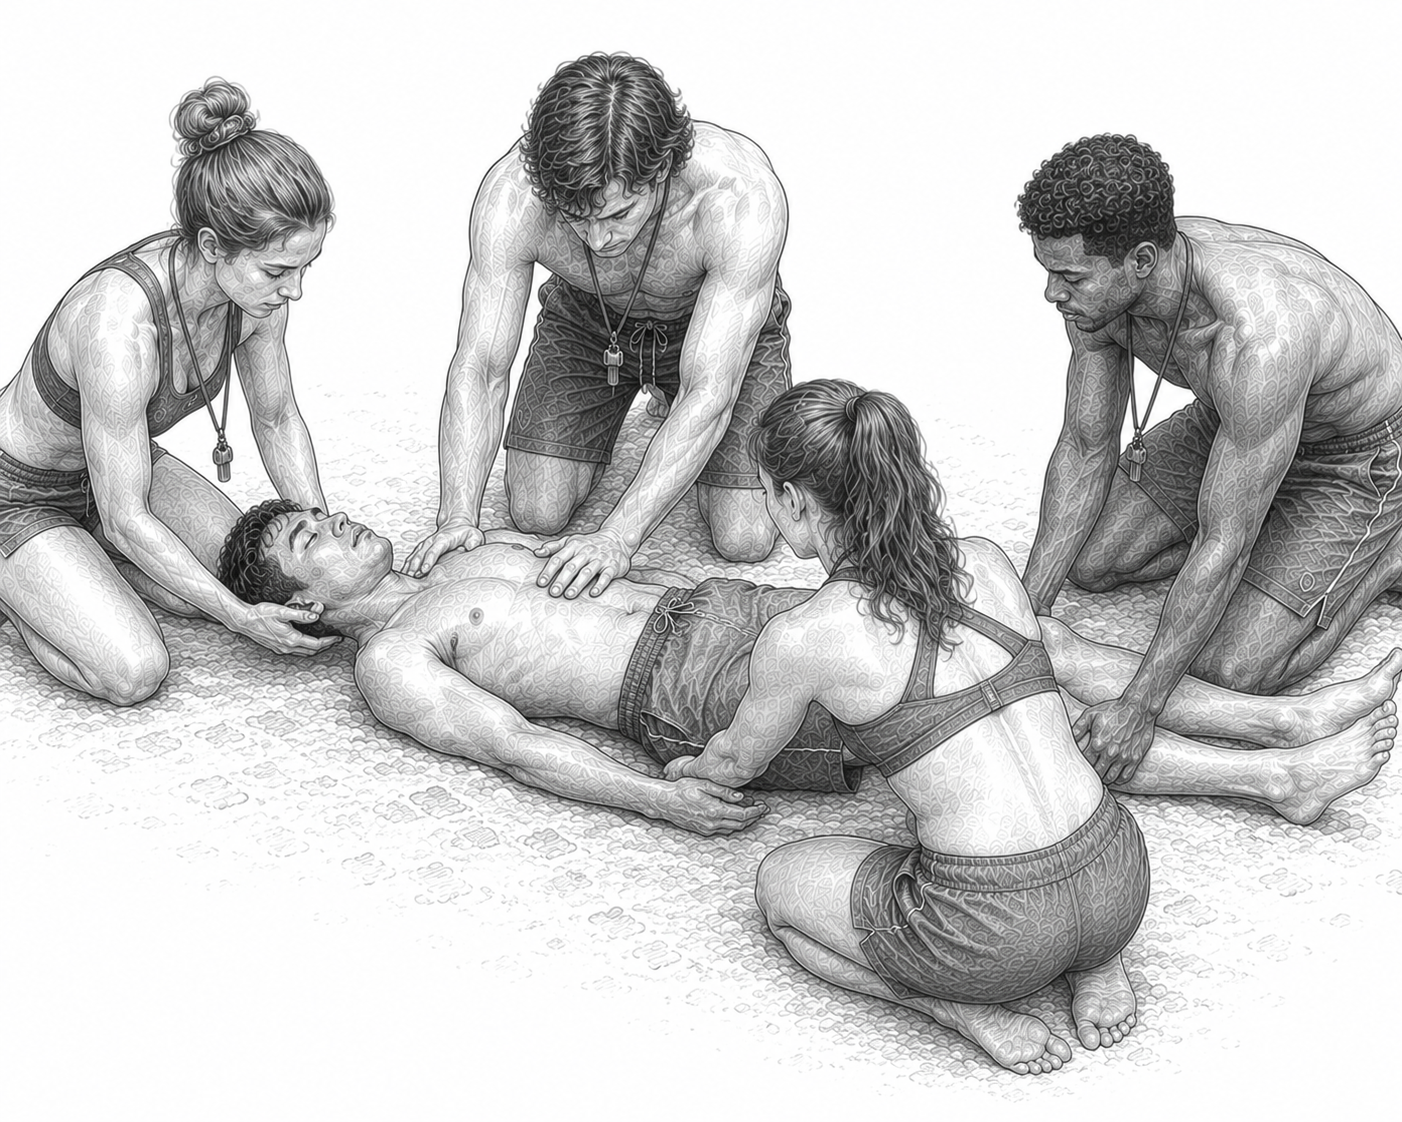
This is not just "lying down." This is a controlled, medical posture.
Why: When the mechanism of injury (e.g., diving into a sandbar or a surfboard collision) suggests a potential spinal injury, any movement can be catastrophic.
The Technique: Your goal is Neutral In-Line Alignment. The head, neck, and spine must be kept in a straight line at all times. On land, this usually involves a team-lift approach where one rescuer acts as the "anchor" at the head, maintaining constant tension until a backboard or spinal immobilization device is fully secured. Do not move, tilt, or roll the patient until the team is synchronized and ready to move as a single unit.
The Bottom Line
In the Impact Zone, your goal is speed. On the sand, your goal is precision.
Don't wait for the ambulance to arrive to think about how your patient is positioned. Whether it's clearing an airway with the Recovery Position or optimizing breathing with the 30-degree tilt, these maneuvers are your first line of defense.
Train these four positions until they are muscle memory. The better your positioning, the better the outcome—before the medics even hit the beach.
Stay safe, stay sharp.
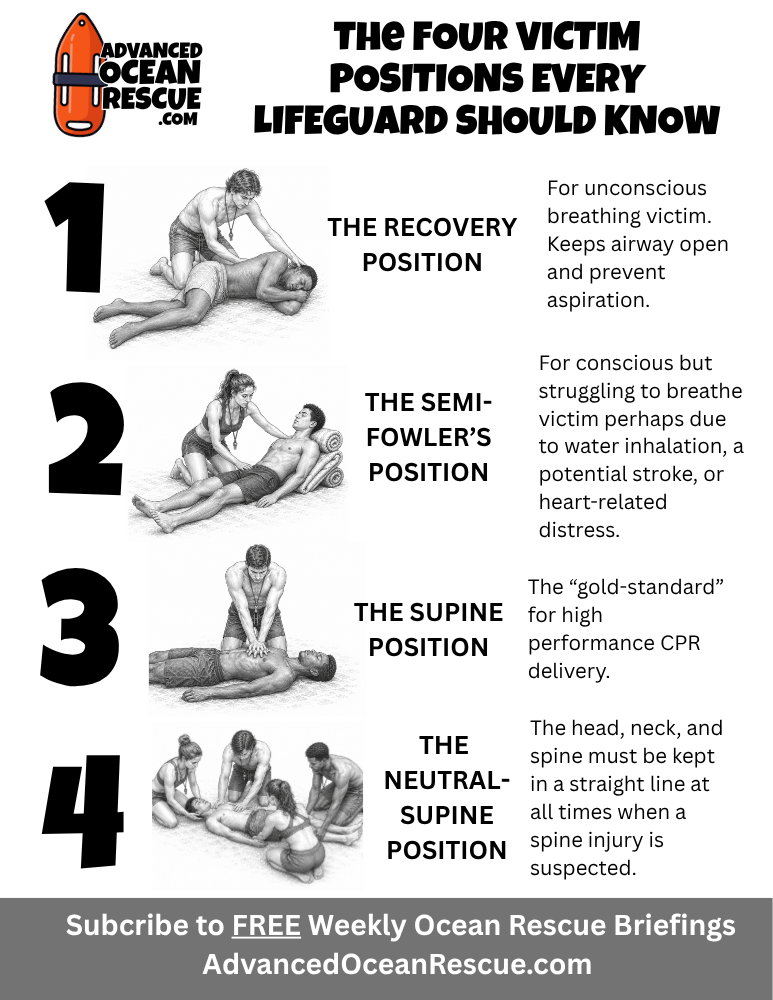
BONUS DOWNLOAD PRINT POSTER
Grab a copy of this printable (8.5 x 11 inch) poster and share with YOUR colleagues and hang it up on the bulletin board.
CLICK HERE to download.